
A hiker can quickly become lost in dense or maze-like backcountry settings, making outdoor navigation skills vital for any wilderness trip. Modern GPS navigation systems are excellent tools for finding your way, but, as with any device, they can fail. Learn multiple techniques for wilderness navigation, so you can get yourself back on track in even the most confusing backcountry locations. When was the last time you planned a trip without a computer or GPS unit? Think hard. Unless you’re a dedicated old-schooler or a Boy Scout, it probably wasn’t recently.
Learning how to navigate with a paper map is an essential skill. If your map skills are rusty, it’s time to brush up. Maps and compasses are the best backups to your navigation system (no battery), and will give you an understanding of the ground you’re hiking over that you just can’t get following a gadget. More importantly: Doing it the way hikers did it 50 years ago is just cool. Let’s brush up on your map abilities with our expert help.
What is a topographic map?
A topographic map is designed to show the physical features and terrain of an area, which is what makes them ideal for backpackers. They’re different from other maps because they show the three-dimensional landscape: its contours, elevations, topographic features, bodies of water, and vegetation.
Why do I need a topo map?
Simplified trail maps—like the JPEG images you might find on a national park’s website— don’t include all the information you need in order to navigate. No elevation data, no magnetic declination, and much fewer symbols. If you get lost, these trail maps won’t help you find your way out. A topographic map offers a wealth of orienteering information—not just elevation and distance, but changes in vegetation and even human-made structures. It’s enough to plan an entire trip in advance or to find your way in a pinch.
Parts of a Map
There are three basic components of a topo map that you need to learn to recognize: contour lines, scale, and legend.
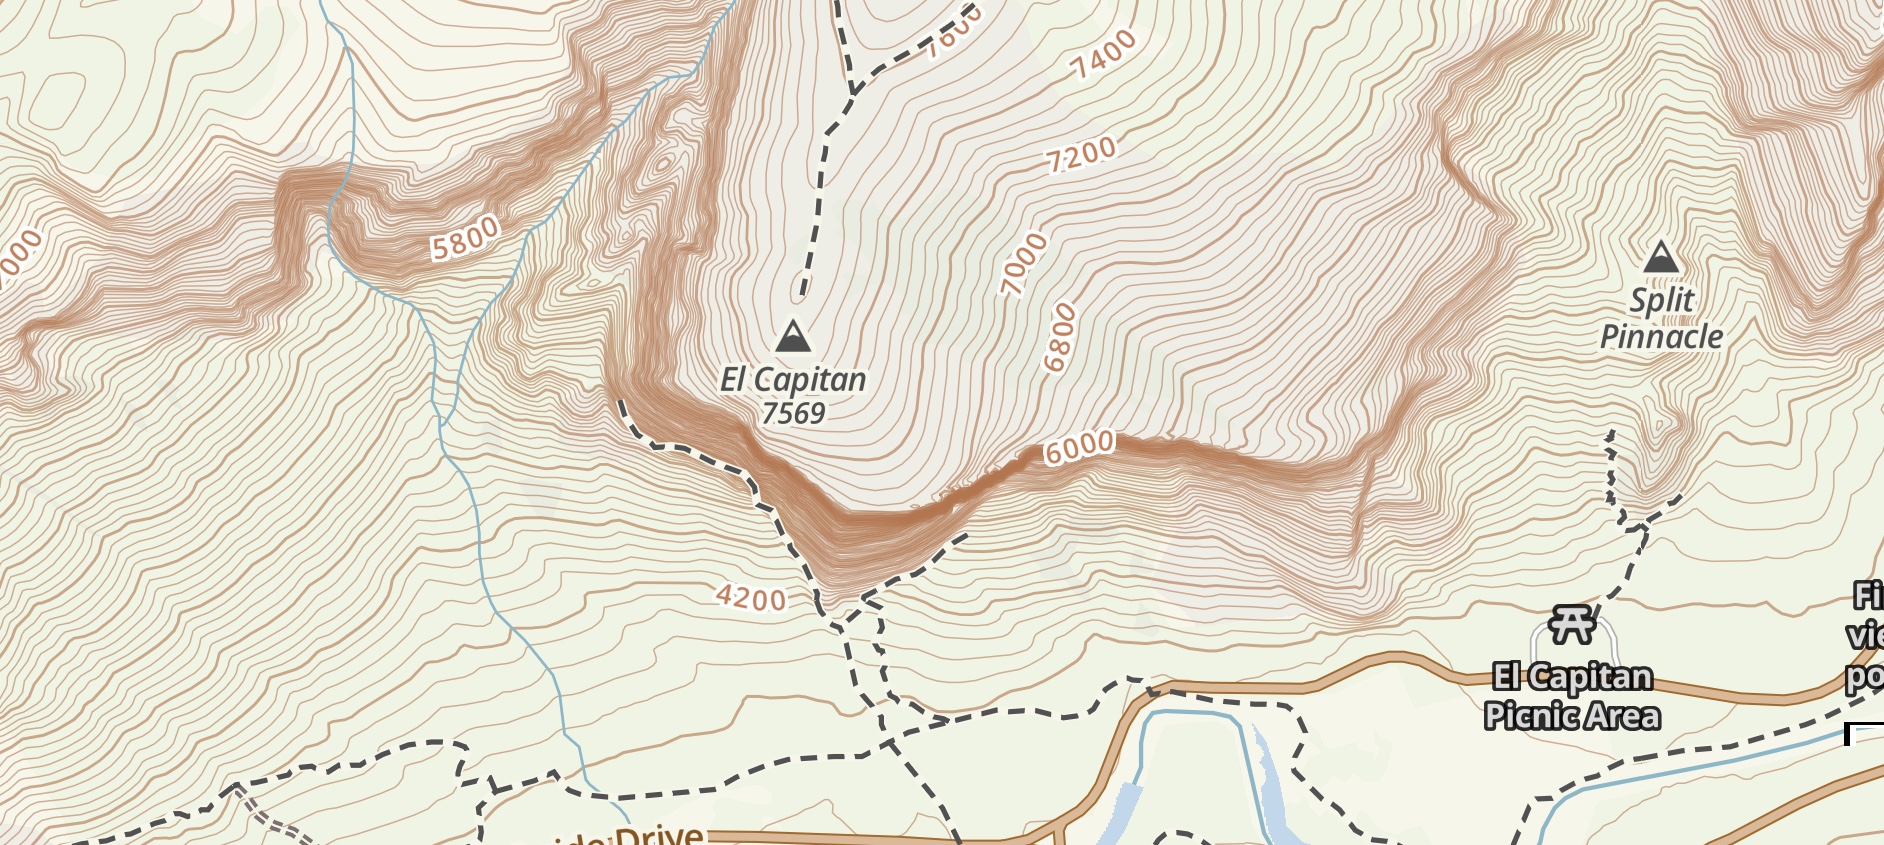
When the contour lines are scrunched up together—like in this map of Yosemite—you’re looking at a cliff.
Contour Lines
Put simply, contour lines show elevation. They’re the bread and butter of understanding a topo map, showing the layout of the terrain and its major features. By showing you the lay of the land and changes in elevation, they’ll give you an idea of what you’ll be walking through and how challenging it will be.
A contour line connects continuous points on the map that share the same elevation. When contour lines are close together, it means that elevation is changing a lot in a short distance. You’re looking at a steep slope or cliff. When they’re far apart, the slope is more gradual.
You’ll notice that every fifth line is thicker than the others. Those thick contour lines are called index lines. At some point along an index line, you can find its elevation written.
The difference in elevation between each contour line is always the same, and that distance is called the contour interval. This number can be found in the map’s legend. Using index lines (with their elevations written on them) and the contour interval (the distance between each line), you can identify the elevation of any contour line on the map.
Contour lines help you visualize the shape of the terrain and its features. Once you understand contour lines, you can point out mountains, valleys, plateaus and depressions. Concentric circles, for example, indicate a mountain peak or a depression. Tightly grouped contour lines might indicate a cliff. Look at the numbers on index lines to see if elevation is increasing or decreasing.
Practice reading contour lines. Sit down with a topo map of a familiar area and see if you can pick out terrain features by looking at the contour lines. Can you identify certain peaks, valleys, ridgelines or saddles? You can also peek at Google Earth to get an overall sense of an area’s terrain before diving into the contours on the topo.
Scale
Scale is the relative distance of the map to real life. The scale can be found in the map legend and usually shows the ratio of map inches to real ground inches. For example, a scale of 1:24,000 means that 1 inch on the map is the equivalent of 24,000 inches—or .38 mile—in reality. (This is the scale used by most USGS topo maps.) The first number, map inches, is always 1.
Scale tells you how detailed the map is. A topo map with a scale of 1:12,000 shows a smaller area and is more detailed than a map with a 1:24,000 scale. It’s important to know how detailed your map is when you’re planning a route.
Maps also include a representative scale, which helps visualize distances in miles or kilometers — much more useful than measuring your hike in inches. Use a piece of string or a ruled compass edge to measure your route on the map with the representative scale.
Legend
The legend basically tells you how to read the map. It contains some key pieces of information:
-
-
- Source data – Where and when the map was made. Check that the map isn’t out of date, and try to get the most recent version possible.
- Scale – Relative distance on the map.
- Contour interval – Change in elevation between each contour line.
- Magnetic declination – The difference between magnetic north and true north in the given area. This varies from place to place, and it’s necessary to set up your compass before you start hiking.
- A color key – Different colors across the map often show the nature of the vegetation. Generally, darker colors mean denser vegetation, while lighter areas mean thin vegetation or even open terrain. Bodies of water are usually blue.
- A symbol key – Most topo maps use symbols to indicate certain features. The key may also explain what different stylized lines mean — like boundaries, rivers and streams, pipelines, roads, or railroads. Topo maps may include symbols for:
-
-
- Buildings
- Different types of vegetation
- Water tanks
- Waterfalls or rapids
- Open pits, mine shafts, or caves
- Marshes, bogs, and swamps
- Glaciers or permanent snowfields
- Lakes or ponds
- Marine shorelines
- High-clearance roads and gates
- Railroads
-
-
-
Preparing for a Trip with a Topo Map
A topographic map is a vital tool for planning any outdoors trip. It will help you plan a route, know what’s ahead of you, and be prepared.
Trails usually appear as thin black lines, while roads are thicker black or red lines. (The key should help you distinguish between them.) As you plan your route, keep an eye on the contour lines. You don’t want to plan a route that takes you over a cliff you can’t climb or across a ridgeline you didn’t prepare for. Generally, you’ll also want to have an idea of how steep the hike will be. Find ways around any landmarks you don’t want to traverse and identify the best routes to ascend any peaks.
Once you’ve picked out a route, use the scale to measure its distance. Using a string rather than a straight edge will give you a much more accurate distance estimate, as it will include the twists and turns in the trail. You don’t want to measure a series of switchbacks as one straight line.
Use the map’s symbols to identify water sources, dangerous areas to avoid (like mine shafts), and changes in vegetation. This information will help you pick out the best campsites and minimize safety risks.
The more you practice reading the topo map, the less likely you are to get lost. Keep your map within reach as you hike and follow your trajectory. Make note of landmarks that you pass and take stock of where you are regularly.
Use smartphones and GPS as a tool to learn rather than as a crutch. As you get used to orienteering with a topo and compass, check your calculations against Google Maps on your smartphone. Does your supposed location on the topo match the blue dot on your phone? As you practice orienteering, your calculations should get more accurate. You should never rely solely on GPS technologies to navigate without a backup plan.
Where to Get a Topo Map
You can find topographic maps from many different sources. The one you choose depends on the place you’re hiking and whether you want to emphasize specific information.
USGS
You can download from the United States Geological Survey (USGS) free of charge in various formats. These are updated every three years.
Local government agencies
Many national parks, national forests, state parks, and other public lands produce detailed maps of their lands. Check their website or local offices to see if they have topographic maps available.
Specialty companies
These companies often produce maps for more popular areas. Sometimes they highlight hiker-specific features, like backcountry campsites, park boundary lines, or certain trails and elevations. (National Geographic’s maps are a great place to start.)
Independent websites
There are a number of websites offering mapping services with customizable, downloadable topo maps that are hiker friendly. Like any other internet resource, just be careful with these. Some of these include: